Quick Guide: How to Operate an Ingco Electric Planer Safely?
Most carpenters skip these critical Ingco electric planer safety steps—and pay the price. Learn setup, gear, and technique before serious injury finds you first.
Most carpenters assume skill alone guarantees a perfect planed surface. It doesn’t. One wrong move with an electric planer causes kickback, ruined blades, or worse — a trip to the emergency room. The Ingco electric planer is a precise, powerful tool, but only in the right hands. Before you touch that door frame, you need to know exactly how to set it up, what safety gear to wear, and which techniques actually work.
What Are the Features and Specs of the Ingco Electric Planer?
Before you can operate an Ingco electric planer safely, you need to comprehend what it offers.
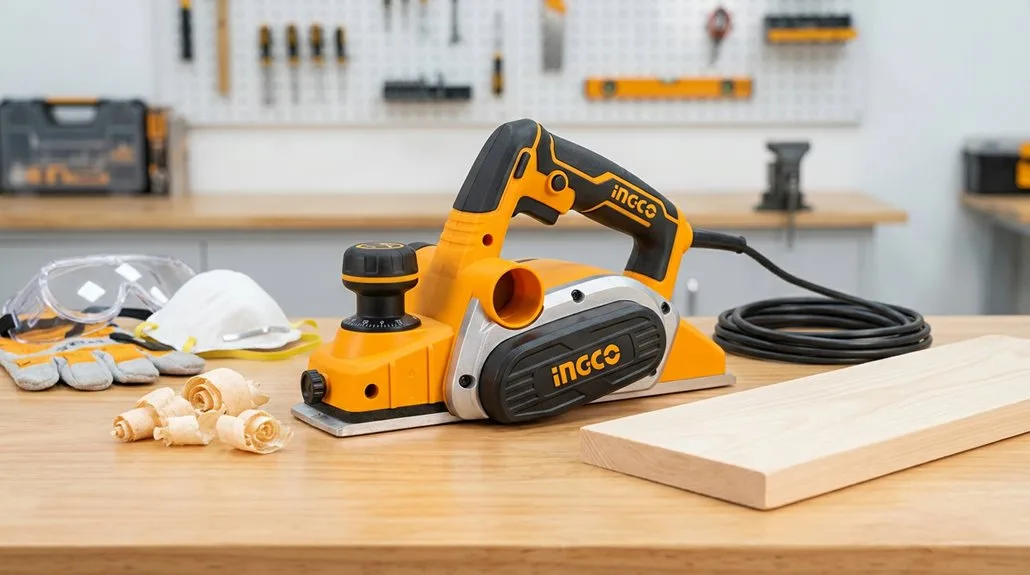
The Ingco electric planer comes in several models, including the PL6808P, PL7508, PL10508, and UPL10508. Each model suits different woodworking needs.
The Ingco electric planer spans multiple models, from the PL6808P to the UPL10508, meeting diverse woodworking needs.
Key specifications include:
Input power: 550W, 680W, 750W, or 1050W
Voltage: 110-240V~50/60Hz
Planing width: 82mm across all models
Cutting depth: Adjustable from 0-1mm up to 0-3mm
No-load speed: 16,000–17,000 RPM
You’ll find the heavy-duty aluminium base delivers great results in durability.
The ergonomic design reduces fatigue during extended use.
Every model includes parallel guides, a depth guide, and extra carbon brushes.
These features make the Ingco planer a delighted choice for both DIY enthusiasts and professionals. The 1050W model is currently available at KSh8,000, making it an accessible option for those looking to invest in a capable woodworking tool. For broader project needs, Ingco also offers power tools and equipment such as demolition breakers, cut-off saws, and air compressors to complement your workshop setup.
What Safety Gear Do You Need Before Using the Ingco Electric Planer?
Using the Ingco electric planer safely starts with wearing the right protective gear. You’re part of a community that values safety, so suiting up correctly matters.
Protect your eyes with BS EN 166-compliant safety glasses or goggles, plus a face shield. Flying wood chips are a real hazard during planing operations.
Planers exceed 85 dB, so wear NRR-rated earplugs or earmuffs to protect your hearing. The CDC reports 12% of U.S. workers suffer noise-related hearing issues.
Use an FFP2 or higher respirator when planing hardwoods or particleboard. Fine dust and silica particles pose serious respiratory risks. For reliable options, FFP2 dust masks offer a high level of filtration and are available in boxed quantities for workshop use.
Always disconnect power before making any adjustments to the cutter head or blades to prevent accidental startup.
Follow these additional gear guidelines:
Wear close-fitting clothing only
Tie back long hair
Remove all jewellery
Wear non-slip footwear
Avoid gloves near spinning blades
How Do You Set Up the Ingco Electric Planer Correctly?
Setting up the Ingco electric planer correctly determines the quality and safety of every cut you make.
Start by inspecting all components after unboxing. Confirm every part is present before assembly begins.
Secure your workpiece using one of two reliable methods:
V-shaped clamping system – locks wood firmly, distributing pressure evenly across dual pieces of matching thickness
Pipe clamp installation – drill holes through your workbench at identical heights on both sides, then slide front and rear clamps onto the pipe
Next, adjust the blade protrusion using the adjuster mechanism. Minimal blade extension prevents excessive material removal and delivers a great result. Before planing any reclaimed timber, slide a rare earth magnet along the surface to detect hidden nails that could damage your blades.
For precision work requiring consistent weight-based measurements during material preparation, a digital check weigher can help verify material quantities before cutting begins.
Finally, engage the safety button before testing the trigger. This verification step confirms your planer is correctly configured and ready for productive use.
How Do You Operate the Ingco Electric Planer?
Once you’ve set up your Ingco electric planer, you’re ready to start cutting with confidence and control.
You’ll need to grasp the power controls, follow key safety steps, and use the correct planing technique to get a great result.
Keeping the planer maintained, including replacing the belt and carbon brushes when needed, guarantees the tool performs reliably over time. The UPL10508 operates at a no-load speed of 16000 rpm, delivering consistent cutting performance across a range of wood surfaces.
Cool Pack cc supplies Ingco power tools to agricultural and industrial clients across South Africa, making it a reliable source for accessing quality equipment like electric planers.
Setting Up the Planer
Before you start planing, you’ll need to set up the Ingco Thickness Planer TP15003 correctly. First, verify the voltage matches your supply: 220-240V at 50/60Hz. The unit draws 1,500W of input power, so use an appropriate outlet.
Next, install the blade by pushing it slightly through the wide throat opening. Secure it with the tightener to prevent slippage past the sole. Align the blade straight out of the box for your initial test run.
Then, secure your workpiece properly. Place it inside a V-shaped holder, or drill pipe-aligned holes through your workbench for added stability. Insert the pipe through the aligned holes, then tighten the clamp around the timber for even pressure distribution. For contractors and farmers requiring compatible accessories, sourcing from a supplier that stocks industrial hardware wholesale can simplify procurement across a single order. The Ingco hand plane features a folded body and sole rather than a traditional cast construction, keeping the tool notably lightweight for extended use. You’re now ready to plane.
Starting and Operating Safely
With your workpiece secured, you can now start operating the Ingco Electric Planer safely. Push the safety button in, then depress the trigger switch. Wait until the planer reaches its full no-load speed of 16,000 RPM before touching the wood.
Follow these steps for great results:
Position the front shoe flat on your workpiece surface
Ease the planer into contact only after reaching full speed
Push steadily forward, maintaining even pressure throughout
Use the V-notch on the base for edge chamfering
Keep a firm grip on both handles at all times
The self-cooling belt system prevents overheating during extended use. You’ll find that consistent forward pressure produces smooth, even cuts.
Ingco planers, available from Coolpack cc in Paulpietersburg, deliver reliable performance for every project. For personalised guidance on selecting the right Ingco planer for your needs, IPSA-certified specialists at Cool Pack CC in Paulpietersburg are available to provide expert advice and tailored solutions.
Maintaining the Planer
Keeping your Ingco Electric Planer in good condition guarantees consistent performance and extends its working life.
Inspect carbon brushes every 100 hours of use. Replace both brushes simultaneously if they’re worn to 3/16 inch or shorter.
Blade maintenance is equally important. Loosen the pinch bolts with an 8mm wrench to remove dull or damaged blades. Use a straight edge to check blade alignment across the cutter head, then tighten the bolts securely.
Clean the infeed and outfeed rollers regularly using mineral spirits and a towel. Unplug the planer before cleaning near the cutter head. Lubricate the elevation leadscrews and gears with a dry PTFE agent for smooth operation.
For storing blades, lubricants, and other maintenance supplies, consider using HDPE plastic containers to protect them from moisture and contamination.
Following these steps delivers a great result: reliable performance every time you work.
How to Plane Edges, Bevels, and Flat Surfaces With the Ingco Planer
Once the Ingco electric planer is properly set up, you’re ready to tackle edges, bevels, and flat surfaces with confidence.
Each task requires a slightly different approach, but the core technique stays consistent.
Here’s what effective planing looks like in practice:
Planing edges: Lock the V-notch onto the wood’s edge, then push steadily forward at full speed.
Creating bevels: Align the V on the base plate, then limit each pass to 1/8 inch for precision.
Flat surfaces: Place the front shoe flat, activate the safety switch, then ease into the cut.
Consistent width: Use parallel guides for edge planing up to 3-1/4 inches.
Visual confirmation: Watch for ribbons, indicating great results from effective cutting action.
How Do You Maintain the Ingco Electric Planer?
Maintaining your Ingco electric planer regularly extends its lifespan and keeps it performing at its best.
Start by inspecting carbon brushes every 100 hours. Replace both brushes simultaneously when they’re worn to 3/16 inch or shorter.
Keep blades sharp and replace them when damaged or dull. Use a straight edge to check blade levelness across the cutter head. Dull blades produce poor results and increase injury risk.
Clean infeed and outfeed rollers with mineral spirits every 10 hours. Remove wood chips and debris from chains and gears regularly. Always unplug the planer before cleaning near the cutter head.
Lubricate elevation leadscrews and gears with a dry PTFE agent. Motor and cutterhead bearings need no lubrication. Inspect the power cord frequently for wear, tears, or damage.
For workspace cleanup after planing sessions, using industrial cleaning rags in a 5kg bulk pack offers an economical and efficient way to wipe down surfaces and remove sawdust buildup from your equipment.