Expert Guide: How to Use an Ingco Cordless Drill at Home?
Most users skip setup steps that silently destroy their Ingco drill. Learn every control, mode, and maintenance step before it's too late.
Most cordless drills don’t fail because of cheap parts — they fail because the person holding them skipped three setup steps. Your Ingco drill’s 20V lithium-ion battery, chuck system, and torque settings aren’t separate features; they’re a system that punishes every wrong move with stripped screws, a burned motor, or cracked masonry. Learning to use each control correctly is the difference between a tool that lasts years and one that dies in months. This guide covers everything you need to know.
What’s Inside Your Ingco Cordless Drill Kit
Most Ingco cordless drill kits come well-equipped straight out of the box. You’ll typically find everything you need to start working immediately. That’s a great result for anyone joining the DIY community.
Ingco cordless drill kits arrive ready to work — everything you need is already inside the box.
Standard kits include these core components:
Two 20V lithium-ion battery packs (commonly 2 x 2.0Ah)
A 1-hour fast charger rated for 220-240V AC
Drill bits in 6mm, 8mm, and 10mm sizes
Masonry drill bits for concrete applications
Screwdriver bits and hex keys
A canvas storage bag for organisation and protection
Your kit also features a 0.8-10mm chuck, accepting most standard drill bit sizes. Premium kits contain 35+ accessories total. You’re getting serious value from day one.
The impact drill in this kit is powered by a brushless motor and delivers a maximum torque of 60 Nm, making it well-suited for demanding home drilling tasks. For extended or back-to-back projects, a dual battery charger allows you to keep both battery packs ready so work is never interrupted.
How to Set Up Your Ingco Drill Before First Use
Before using your Ingco cordless drill for the first time, you’ll need to complete a few important setup steps. Follow these four steps to get started:
Charge the battery by aligning the battery rails with the handle rails and pushing it into the charger until the latch locks.
Read the manual thoroughly, reviewing all safety precautions before operating.
Install the auxiliary handle by loosening the locking screw anti-clockwise, sliding the clamping loop over the collar, and tightening it clockwise.
Insert a drill bit by turning the chuck key anti-clockwise to open the chuck, inserting your bit firmly, then tightening clockwise.
Once you’ve completed these steps, test your power controls without load to confirm everything works correctly. The Ingco kit includes a canvas bag for conveniently transporting the drill and all its accessories between jobs. For worksites that require precise material measurement, pairing your toolkit with a digital check weigher ensures accurate weight readings across packaging and industrial tasks.
Which Drill Bit to Use With Your Ingco Kit
Choosing the right drill bit makes all the difference between a clean, accurate hole and a damaged surface. Your Ingco kit supports several bit types, each suited to specific materials.
HSS bits (2mm–13mm): Use these for metal, hardwood, and general materials
Masonry bits (4mm–10mm): Use these for concrete, brick, and stone
Glass bits (4mm–12mm): Use these for precise glass drilling without cracking
Match your bit to your material every time. The 16-piece and 22-piece Ingco multi-material sets give you HSS, masonry, and screwdriver bits together, which is a great result for home projects. You’ll feel confident knowing you’re using the right tool for the job.
Coolpack cc stocks these sets in Paulpietersburg, South Africa. The Ingco 6 Pcs Metal Drill Bits Set includes sizes ranging from 2mm to 8mm, made from HSS 4341 material, making it reliable for drilling through metal and hardwood with precision. For tailored advice on which Ingco drill bit set suits your specific project, you can contact the Paulpietersburg office directly to speak with an expert who understands your requirements.
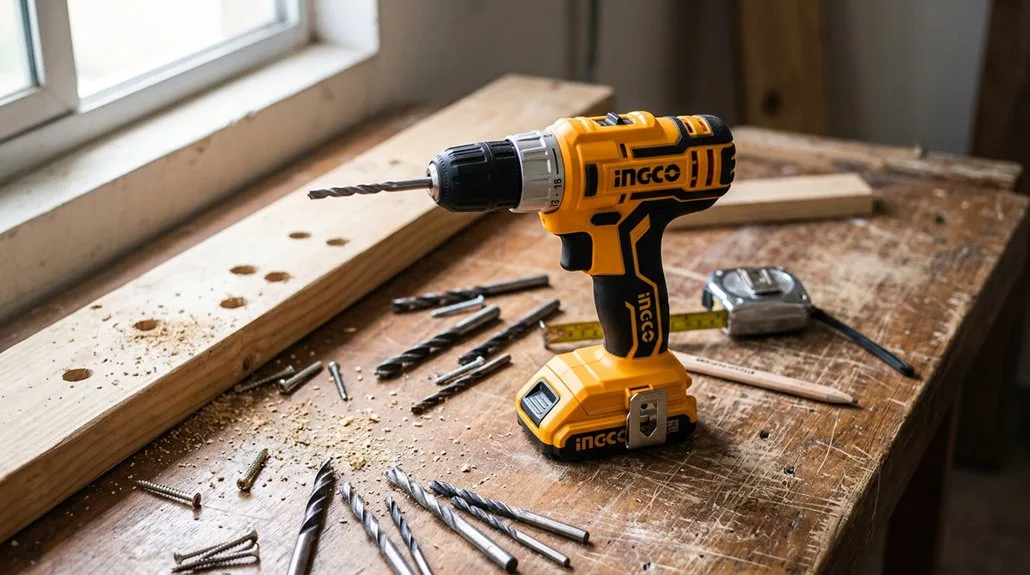
How to Use Your Ingco Cordless Drill Step by Step
Getting your Ingco cordless drill ready takes only a few simple steps. Follow this sequence to drill confidently and get great results every time.
Install the battery by sliding it into the slots until it clicks firmly.
Insert your bit by rotating the chuck counterclockwise, inserting the bit fully, then tightening clockwise by hand.
Set direction by sliding the forward/reverse lever left for forward rotation.
Select torque starting at a low setting, then increase gradually as needed.
Squeeze the variable speed trigger for proportional speed control.
Maintain steady pressure without forcing the drill.
Release the trigger completely before changing direction.
For faster bit changes, reinsert the battery and hold the end of chuck while applying the trigger to tighten or loosen quickly.
For personalised guidance on your Ingco cordless drill, IPSA-certified specialists are available to provide expert advice tailored to your specific needs.
Ingco Drill Modes Explained: When to Drill vs. Impact
Switching between modes on your Ingco cordless drill releases its full range of capabilities. Each mode serves a specific purpose, and using the right one delivers great results.
Drill mode bypasses the clutch entirely, providing full torque for creating holes in wood, metal, and plastic.
Drive mode activates the clutch system, limiting torque to your selected setting. This protects your workpieces from damaged surfaces and stripped fasteners.
Impact mode delivers rapid rotational strikes, increasing output to 650Nm or even 1,000Nm on select Ingco models. You’ll find this mode indispensable for loosening seized fasteners.
Hammer drill mode**** combines rotation with a hammering action, making it ideal for concrete and masonry. The hammering mechanism only engages when the chuck is pressed against material, so maintaining steady pressure is essential for consistent results.
Start at lower torque settings and work upward. For contractors and builders working across demanding sites, pairing your drill with appropriate heavy-duty safety wear ensures both compliance and protection on the job. Always verify your selected mode before driving.
How to Set Torque on Your Ingco Cordless Drill
Commanding the torque ring on your Ingco cordless drill protects your workpieces and delivers consistent, professional results. The torque ring sits near the chuck and rotates to select numbered resistance levels.
Follow these steps for great results:
Activate screwdriving mode before engaging the clutch ring
Start at setting 1 to prevent damaging delicate materials
Increase gradually until fasteners seat correctly without overdriving
Store your drill at the lowest setting to protect the internal spring
Higher numbers deliver greater rotational force for tougher applications. Lower numbers suit softer materials like pine or drywall. Testing each increment helps you dial in the precise setting your project needs. Protecting that spring extends your drill’s operational lifespan considerably.
How to Clean, Store, and Maintain Your Ingco Drill
Maintaining your Ingco cordless drill after every use keeps it performing reliably for years.
Wipe the drill with a dry cloth after each session. Keep ventilation slots clear to guarantee proper airflow to the motor.
A quick wipe-down after every use and clear ventilation slots keep your drill running at peak performance.
In dusty environments, clean the drill thoroughly after use. Dust buildup damages internal motor components over time.
Allow the tool to run without load for 5 to 10 minutes after heavy use to cool the motor rapidly.
Store your drill in a dry, temperature-controlled location. Protect it from moisture to prevent corrosion and electrical damage.
Schedule routine maintenance intervals to catch wear early and extend your drill’s lifespan.
For stubborn grease or grime on the drill’s exterior casing, a heavy duty industrial cleaner applied sparingly to a cloth can help remove buildup without damaging the surface.