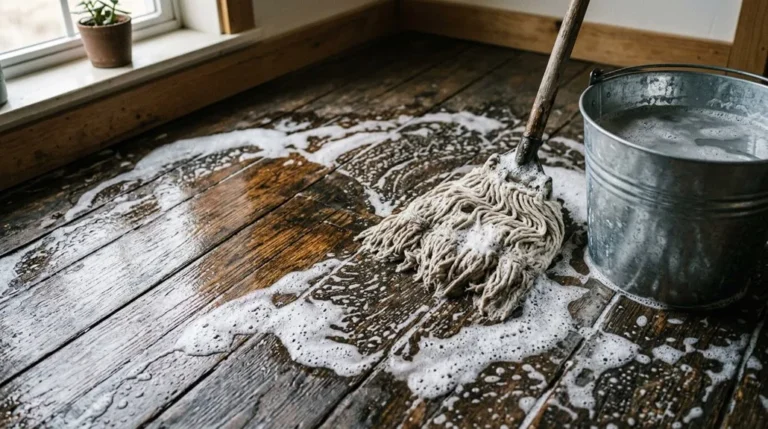
Pine gel cleans everything — until it meets real wood. What seems like a safe, everyday cleaner can quietly dull finishes, leave behind sticky residue, or cause permanent staining that no amount of buffing will fix. The outcome hinges on three critical factors most people never consider before grabbing the bottle. Get them wrong, and the damage is done before you realise it. Get them right, and your wood stays protected. Here is exactly what you need to know.
What Pine Gel Actually Does to Real Wood Surfaces
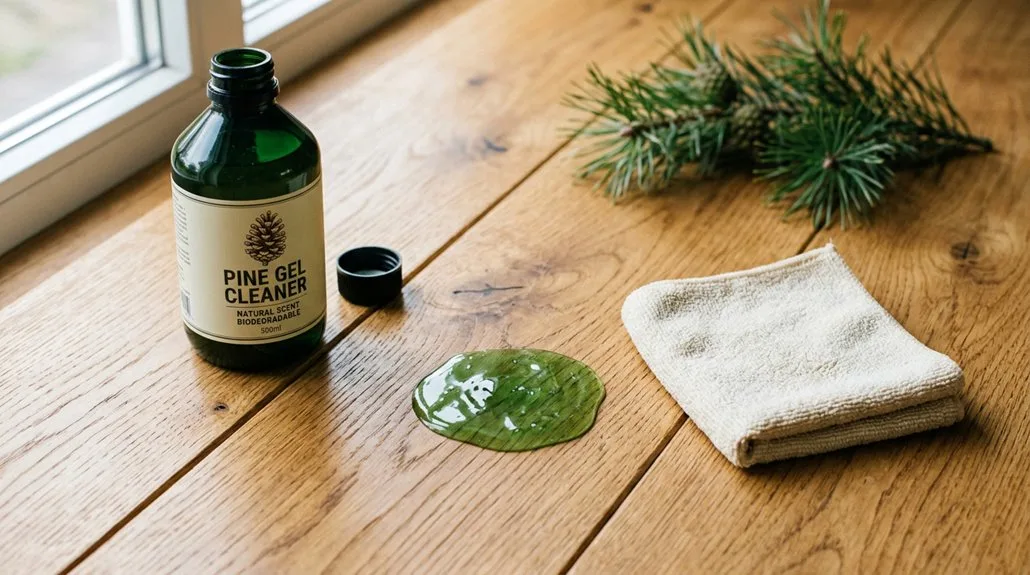
When you clean real wood surfaces with pine gel, it works on the outer layer rather than soaking into the grain. It suspends dirt, then rinses off cleanly. This surface-level action protects the wood’s structure.
Pine gel leaves a fresh pine scent after cleaning. It doesn’t penetrate sealed wood, making it a great result for maintaining finished floors. You’ll notice minimal residue when you dilute it correctly.
Here’s what pine gel does on real wood surfaces:
- Sits on sealed wood without deep absorption
- Suspends dirt for easy rinsing
- May leave a sticky film on unsealed wood if undiluted
- Can dull the finish if over-applied without rinsing
Always use it on sealed wood for the best outcome. For tougher grime on wood surfaces in industrial settings, a heavy duty industrial cleaner may be more appropriate than pine gel. On unsealed pine specifically, uneven absorption is a concern since pine absorbs unevenly across knots and porous areas throughout the wood surface.
Is Pine Gel Safe for Real Wood Floors and Furniture?
Knowing how pine gel behaves on wood surfaces helps you decide whether it’s safe for your floors and furniture. Pine gel is safe for sealed wood, but you must dilute it correctly.
Pine gel is safe for sealed wood surfaces — but only when you dilute it correctly before use.
For hardwood floors, mix ¼ cup Pine-Sol per gallon of water. For furniture disinfection, use 1 cup per ½ gallon. Always dampen surfaces only — never soak them.
Follow these key rules:
- Use a microfibre mop to minimise moisture absorption
- Wait 10 minutes for disinfection to work
- Rinse stubborn spots after applying full-strength pine gel
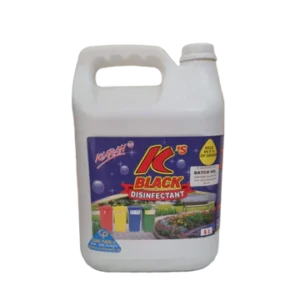
You’ll get a great result by avoiding ammonia, oil, or glass cleaners that damage wood finishes. Pine gel, used correctly, delivers effective cleaning with a fresh scent your household will appreciate. For large-scale cleaning needs, sourcing pine gel through a wholesale industrial cleaning supplier ensures you get premium-grade product at competitive pricing. Never use pine gel on unsealed, waxed, or oiled wood, as it can cause damage to unprotected surfaces.
Which Wood Types React Badly to Pine Gel?
Not all wood types handle pine gel the same way. Pine is the most notorious species for reacting badly to strong cleaning solutions. It has uneven densities and pores, which causes inconsistent absorption across the surface.
This uneven absorption leads to blotching, a patchy, uneven appearance that’s difficult to reverse. You’ll get a great result by using pigment-based products on pine instead, as they’re more forgiving than dye-based formulas. Gel formulations also show less blotching on pine compared to dye stains.
Here’s what makes pine particularly vulnerable:
- Uneven pore density causes inconsistent product absorption
- Dye stains penetrate unpredictably across the surface
- Blotching appears quickly with incorrect product application
Knowing your wood type helps you make smarter cleaning decisions. For tailored advice on the right cleaning products for your specific wood surfaces, IPSA-certified specialists can provide expert guidance to help you avoid costly mistakes. Pine and other vulnerable wood types are also at greater risk of wood decay when moisture content rises above 20%, making proper cleaning and drying practices even more critical.
How to Clean Real Wood With Pine Gel Without Causing Damage
Cleaning real wood with pine gel is straightforward if you follow the correct steps. Always wear protective gloves, safety glasses, and ensure good ventilation before starting. For reliable hand protection during cleaning tasks, latex disposable gloves are a practical and affordable option widely used across household and industrial settings.
Dilute pine gel at a ratio of 1 part product to 40 parts clean water. Apply the diluted solution by spray or mop directly onto your sealed wood surface. Let it sit for a few minutes on heavily soiled areas.
Wipe or mop away loosened dirt, then rinse thoroughly with clean water. You’ll get a great result when no residue remains on the surface. Pine gel’s anionic surfactants break down grease quickly, leaving a streak-free, pine-fresh finish. Following these steps means you’re cleaning effectively while protecting your wood and staying safe.
Pine gel is based primarily on pine oil, a renewable resource, making it a more environmentally considered choice compared with some harsh chemical cleaners.
Signs You Applied Too Much Pine Gel on Real Wood
Following the correct cleaning steps gives your wood a great result, but over-application is a real risk worth watching for.
You’ll notice warning signs quickly if you’ve used too much pine gel.
Watch for these key indicators:
- Moisture damage: Surface warping and uneven swelling signal excess saturation
- Discolouration: Darkening spots, yellowing, and blotchy patterns appear on unfinished pine
- Texture changes: Sticky or tacky residue remains when gel layers are too thick
- Structural warnings: Lifted grain and widening splits indicate deep gel penetration
- Application failures: Pooled gel creates glossy, uneven spots that resist absorption
You’re not alone in making this mistake.
Catching these signs early protects your wood’s structural integrity and finish from long-term deterioration. Unfinished wood is especially vulnerable because it readily soaks up excess moisture, leading to swelling, cracking, and rot. Using purpose-formulated industrial cleaning chemicals helps reduce the risk of over-saturation damage on both finished and unfinished wood surfaces.
How to Fix Pine Gel Damage on Real Wood Surfaces
When pine gel damage appears on real wood, acting quickly gives you the best chance of a full recovery. Blot excess gel immediately with a clean, dry cloth. Don’t rub, as rubbing spreads the damage further.
Act fast when pine gel damages real wood — blot immediately, never rub, for the best chance of full recovery.
For surface discolouration, apply a small amount of mineral spirits using a soft cloth. Work in circular motions across the affected area.
If the finish has lifted or turned cloudy, light sanding with 220-grit sandpaper restores the surface. Sand with the wood grain, never against it.
Follow these repair steps:
- Wipe residue with a dry cloth
- Apply mineral spirits sparingly
- Sand lightly using 220-grit paper
- Refinish with matching wood polish
Coolpack cc stocks wood-safe cleaning products that help you avoid these situations entirely. Based in Paulpietersburg, Kwazulu Natal, they supply packaging solutions, industrial products, and safety wear to customers across South Africa.
How to Protect Wood After Cleaning With Pine Gel
After cleaning wood with Pine Gel, you’ll need to condition, seal, and protect the surface to restore its protective envelope. Apply a preservative like copper naphthenate (minimum 2% copper content) by brushing it liberally into all cleaned areas, cuts, and holes until the wood reaches saturation. For best results, you should select your preservative based on exposure risk — ground-contact wood requires higher retention levels than above-ground structures like decks. For ongoing wood maintenance on industrial or commercial sites, sourcing your supplies from a dedicated industrial products supplier ensures you have access to the right tools and materials for the job.
Post-Cleaning Wood Conditioning
Protecting wood after cleaning with pine gel requires one critical step: applying a pre-stain wood conditioner. Brush one even layer onto your cleaned, sanded pine surface, following the grain direction. Wait 30 minutes before applying any stain.
This step matters most for softwoods like pine, spruce, fir, and birch. These woods have high porosity, meaning they absorb stain unevenly without conditioning. The conditioner seals the pores, preventing blotchy dark spots.
Key preparation facts:
- Sand with 120-220 grit before applying conditioner
- Allow 20-30 minutes penetration time
- Test colour on a hidden area first, as conditioning lightens final stain shade
Oil-based stains demand conditioning most on softwoods. Water-based stains also pair well with conditioners. For precise finishing work on wood surfaces, having the right cutting tools on hand — such as a retractable carpenter’s knife — allows you to score, trim, and clean edges cleanly before conditioning. You’ll get a great result with this straightforward process.
Sealing and Protecting Wood
Once your wood is clean and conditioned, sealing is the next critical step. A quality sealant locks in moisture and protects the wood grain from future damage. You’ll get a great result by applying sealant within 24 hours of conditioning.
Choose a sealant that matches your wood type, whether hardwood, softwood, or engineered wood. Oil-based sealants penetrate deeply, while water-based options dry faster. Both provide reliable surface protection.
Follow these sealing steps:
- Apply thin, even coats using a clean brush
- Allow each coat to dry fully before reapplying
- Use 2–3 coats for high-traffic surfaces
- Inspect sealed areas every 6–12 months
Sealing your wood keeps your space looking professional and well-maintained. Your effort here protects the wood long-term. For storing leftover sealant or mixed solutions, glass and plastic bottles from a reliable packaging supplier help preserve product integrity between applications.